deha magazine / オフショア開発 / CookieによるAPI経由のユーザー認証機能を作る【Laravel6とNuxt.jsで作る管理画面】
CookieによるAPI経由のユーザー認証機能を作る【Laravel6とNuxt.jsで作る管理画面】
2020/06/01
PHPの人気のフレームワークLaravelを利用してWebサイトの管理画面を開発することができます。
このシリーズではそんな管理画面の構築に関して、技術者向けにその手順を紹介しています。
この記事ではCookieでAPI経由のユーザー認証機能を作る方法をご紹介!
Nuxt.jsからLaravelのAPIをAjaxで通信できるようにする手順はこちらの記事で解説中。
・Laravelを使って構築をしたい方
・Webサイト構築の具体的な手法が知りたい方
これらに当てはまる方におすすめの記事となっています。このシリーズを読めばLaravel6とNuxt.jsで管理画面を作成することができますよ。
最低限やりたいことを決める
まず実装の前に、最低限やりたいことを決めておきます。あれもこれもと機能を詰め込みすぎてしまっても実装に時間がかかってしまい大変です。今回は管理画面を作りたいので、以下の要件にしました。
● ユーザー登録機能は実装せず、事前に用意した管理者ユーザーでログインできる
● /adminにアクセスした際にログインしていない場合は、ログイン画面に遷移する
セッションをDB管理するか決める
ユーザー認証を実装する前にまずセッションの管理方法を決めます。
認証完了後にセッションはスタートし、セッションが有効な間は認証済と扱われてしまうなど、これらは関係が深いのです。
セッション情報には、大きく分けて以下の2つの管理方法があります。
● MySQLやRedis等のDBに保存しておく方法
● Cookieやトークンでデータを都度送る方法
DB管理する方法は外部へのデータ取得が必要になり処理時間がかかってしまいます。また実装が必要になり手間も。
メリットはDBにセッション情報を持っていて、即時セッションを無効にすることが出来るため、
金融系など厳しいセキュリティが求められるサービスには有効です。
一方、Cookieやトークンで都度送る方法は有効期限が切れるまでセッションを無効には出来ませんが、標準サポートされていることも多く、動作も実装のスピードも早いです。
今回は即時セッションを無効にしたい要件でも無いため、データを都度送る方法でセッション管理を行うことにします。
Cookieとトークンどちらを使うか決める
先ほど決めたCookieやトークンでデータを都度送る方法のうち、どちらを選択するかを決めていきます。
トークンを利用する場合は、標準仕様であるJWT(JSON Web Token)に沿った方法を取るのが一般的です。
今回の記事ではトークン(JWT)は使わず、Cookieによる認証機能を採用しています。
本記事では詳述はしませんが、トークン(JWT)を利用する場合は、セキュアなトークンの保存方法や署名のアルゴリズムなど、考えるべき要素が増えるためです。
LaravelのAuthミドルウェアはデフォルトで暗号化されたCookieをサポートしていますし、今回はネイティブアプリでもないため、Cookieを使うことに決めました。
管理者ユーザー用のモデルとテーブルを作成する
まず下記コマンドで管理者ユーザー用のモデルとマイグレーションファイルを作成します。
php artisan make:model AdminUser --migrationLaravel6ではデフォルトで一般ユーザー用のモデルが、app/User.phpに用意されているため、
内容をコピーして以下のようにapp/AdminUser.phpを書き換えます。
<?php

namespace App;

use Illuminate\Contracts\Auth\MustVerifyEmail;
use Illuminate\Foundation\Auth\User as Authenticatable;
use Illuminate\Notifications\Notifiable;

class AdminUser extends Authenticatable
{
    use Notifiable;

    /**
     * The attributes that are mass assignable.
     *
     * @var array
     */
    protected $fillable = [
        'name', 'email', 'password',
    ];

    /**
     * The attributes that should be hidden for arrays.
     *
     * @var array
     */
    protected $hidden = [
        'password', 'remember_token',
    ];

    /**
     * The attributes that should be cast to native types.
     *
     * @var array
     */
    protected $casts = [
        'email_verified_at' => 'datetime',
    ];
}
同様に新しく追加したマイグレーションファイルも下記のように書き換えます。
<?php

use Illuminate\Database\Migrations\Migration;
use Illuminate\Database\Schema\Blueprint;
use Illuminate\Support\Facades\Schema;

class CreateAdminUsersTable extends Migration
{
    /**
     * Run the migrations.
     *
     * @return void
     */
    public function up()
    {
        Schema::create('admin_users', function (Blueprint $table) {
            $table->bigIncrements('id');
            $table->string('name');
            $table->string('email')->unique();
            $table->timestamp('email_verified_at')->nullable();
            $table->string('password');
            $table->rememberToken();
            $table->timestamps();
        });
    }

    /**
     * Reverse the migrations.
     *
     * @return void
     */
    public function down()
    {
        Schema::dropIfExists('admin_users');
    }
}
次に以下コマンドを実行してDBに反映します。
php artisan migrateこれでadmin_usersテーブルが作成されました。
ログイン用の管理者ユーザーのデータを用意する
次にtinkerでログイン用の管理者ユーザーのデータを用意します。
下記コマンドを実行してtinkerを起動します。
php artisan tinker次に以下のコマンドでログイン用のデータを作成します。
パスワードはtinker経由だと平文で保存されてしまうため、ハッシュ化を行っています。
AdminUser::create(['name' => 'hoge', 'email' => 'hoge@example.com', 'password' => Hash::make('hogehoge')])Laravel(API)でCookieを使ったセッション管理を有効にする
LaravelはAPIとして利用する場合、デフォルトの認証方法はトークンを想定しており、
Cookieをレスポンスとして返してはくれません。
そのためapp/Http/Kernel.phpを以下のように編集することで、
フォーム認証(Web)と同様にAPIでもログイン後にセッション情報を暗号化されたCookieで返せるようになります。
/**
* The application's route middleware groups.
*
* @var array
*/
protected $middlewareGroups = [
  'web' => [
      \App\Http\Middleware\EncryptCookies::class,
      \Illuminate\Cookie\Middleware\AddQueuedCookiesToResponse::class,
      \Illuminate\Session\Middleware\StartSession::class,
      // \Illuminate\Session\Middleware\AuthenticateSession::class,
      \Illuminate\View\Middleware\ShareErrorsFromSession::class,
      \App\Http\Middleware\VerifyCsrfToken::class,
      \Illuminate\Routing\Middleware\SubstituteBindings::class,
  ],

  'api' => [
      //ここから
      \App\Http\Middleware\EncryptCookies::class,
      \Illuminate\Cookie\Middleware\AddQueuedCookiesToResponse::class,
      \Illuminate\Session\Middleware\StartSession::class,
      \Illuminate\View\Middleware\ShareErrorsFromSession::class,
      //ここまで追加
      'throttle:60,1',
      \Illuminate\Routing\Middleware\SubstituteBindings::class,
  ],
];
Authミドルウェアの設定を変更する
次にconfig/auth.phpを下記のように編集して、APIの認証方法をCookieを使ったセッションに変更します。
またパスワード情報はadmin_usersテーブルを参照するようにしています。
本来は一般ユーザーと管理者ユーザーは設定を分けるべきですが、時間がかかってしまうので、一旦全てのAPI認証をadmin_usersテーブルに向けています。
<?php

return [

    /*
    |--------------------------------------------------------------------------
    | Authentication Defaults
    |--------------------------------------------------------------------------
    |
    | This option controls the default authentication "guard" and password
    | reset options for your application. You may change these defaults
    | as required, but they're a perfect start for most applications.
    |
    */

    'defaults' => [
        'guard' => 'api',
        'passwords' => 'admin_users',
    ],

    /*
    |--------------------------------------------------------------------------
    | Authentication Guards
    |--------------------------------------------------------------------------
    |
    | Next, you may define every authentication guard for your application.
    | Of course, a great default configuration has been defined for you
    | here which uses session storage and the Eloquent user provider.
    |
    | All authentication drivers have a user provider. This defines how the
    | users are actually retrieved out of your database or other storage
    | mechanisms used by this application to persist your user's data.
    |
    | Supported: "session", "token"
    |
    */

    'guards' => [
        'web' => [
            'driver' => 'session',
            'provider' => 'users',
        ],

        'api' => [
            'driver' => 'session',
            'provider' => 'admin_users',
        ],

        // 'api' => [
        //     'driver' => 'token',
        //     'provider' => 'users',
        //     'hash' => false,
        // ],
    ],

    /*
    |--------------------------------------------------------------------------
    | User Providers
    |--------------------------------------------------------------------------
    |
    | All authentication drivers have a user provider. This defines how the
    | users are actually retrieved out of your database or other storage
    | mechanisms used by this application to persist your user's data.
    |
    | If you have multiple user tables or models you may configure multiple
    | sources which represent each model / table. These sources may then
    | be assigned to any extra authentication guards you have defined.
    |
    | Supported: "database", "eloquent"
    |
    */

    'providers' => [
        'users' => [
            'driver' => 'eloquent',
            'model' => App\User::class,
        ],
        'admin_users' => [
            'driver' => 'eloquent',
            'model' => App\AdminUser::class,
        ],

        // 'users' => [
        //     'driver' => 'database',
        //     'table' => 'users',
        // ],
    ],

    /*
    |--------------------------------------------------------------------------
    | Resetting Passwords
    |--------------------------------------------------------------------------
    |
    | You may specify multiple password reset configurations if you have more
    | than one user table or model in the application and you want to have
    | separate password reset settings based on the specific user types.
    |
    | The expire time is the number of minutes that the reset token should be
    | considered valid. This security feature keeps tokens short-lived so
    | they have less time to be guessed. You may change this as needed.
    |
    */

    'passwords' => [
        'users' => [
            'provider' => 'users',
            'table' => 'password_resets',
            'expire' => 60,
            'throttle' => 60,
        ],
        'admin_users' => [
            'provider' => 'admin_users',
            'table' => 'password_resets',
            'expire' => 60,
            'throttle' => 60,
        ],
    ],

    /*
    |--------------------------------------------------------------------------
    | Password Confirmation Timeout
    |--------------------------------------------------------------------------
    |
    | Here you may define the amount of seconds before a password confirmation
    | times out and the user is prompted to re-enter their password via the
    | confirmation screen. By default, the timeout lasts for three hours.
    |
    */

    'password_timeout' => 10800,

];
ログイン用のルーティングを用意する
routes/api.php を以下のように編集して、ログイン処理と現在ログイン中のユーザーの取得が出来るようにします。
先程の設定でAPIミドルウェアの場合はadmin_usersテーブルを参照するようになったので、Auth::user()の返り値はログイン中のAdminUserのレコードになります。
Route::group(["middleware" => "api"], function () {
    Route::post('/login', 'Auth\LoginController@login');
    Route::get('/current_admin_user', function () {
        return Auth::user();
    });
});
下記コマンドを実行してルーティングが作成されているか確認します。
php artisan route:list以下のように表示されていればOKです。

ログイン成功時のレスポンスを変更する
AuthミドルウェアはデフォルトではWebを想定しているため、ログイン後にリダイレクトするようになっています。(参考はこちら)
そのため、app/Http/Controllers/Auth/LoginController.phpを以下のように編集することで、
ログイン成功時にリダイレクトではなく、ログインしたユーザー情報を返すように変更しています。
<?php

namespace App\Http\Controllers\Auth;

use App\Http\Controllers\Controller;
use App\Providers\RouteServiceProvider;
use Illuminate\Foundation\Auth\AuthenticatesUsers;
//追加
use Illuminate\Http\Request;

class LoginController extends Controller
{
    /*
    |--------------------------------------------------------------------------
    | Login Controller
    |--------------------------------------------------------------------------
    |
    | This controller handles authenticating users for the application and
    | redirecting them to your home screen. The controller uses a trait
    | to conveniently provide its functionality to your applications.
    |
    */

    use AuthenticatesUsers;

    /**
     * Where to redirect users after login.
     *
     * @var string
     */
    protected $redirectTo = RouteServiceProvider::HOME;

    /**
     * Create a new controller instance.
     *
     * @return void
     */
    public function __construct()
    {
        $this->middleware('guest')->except('logout');
    }

    /**
     * The user has been authenticated.
     *
     * @param  \Illuminate\Http\Request  $request
     * @param  mixed  $user
     * @return mixed
     */
    //追加
    protected function authenticated(Request $request, $user)
    {
        return $user;
    }
}
curlコマンドでログインの動作を確認する
以上でAPIのログイン機能は実装が完了しているので、curlコマンドで動作の確認をしてみます。
下記コマンドを実行します。
curl -c cookie.txt -X POST localhost:8000/api/login -d email=hoge@example.com -d password=hogehoge以下のようなユーザー情報が返ってくればOKです。

Cookieがcookie.txtに出力されるので、次は下記コマンドを実行してログイン中の管理者ユーザーの取得を試します。
curl -b cookie.txt http://localhost:8000/api/current_admin_user同様に以下のようなユーザー情報が返ってくればOKです。

上記の通り、curlの-bオプションをつけると、
出力されたCookie情報を使ってリクエストを投げることが出来ます。
cookie.txtは確認が終わったら削除しておきましょう。
Laravel(API)でCORSの設定を行う
Cookieはデフォルトでは異なるドメインで送受信を行うことは出来ません。
NuxtとLaravelは別ドメインで動かすので、指定したドメイン間の通信を許可するCORS(Cross-Origin Resource Sharing )の設定を行う必要があります。
LaravelのCORS設定にはfruitcake/laravel-corsというライブラリが有名です。
まず下記コマンドでインストールします。
composer require fruitcake/laravel-corsインストールが完了したらapp/Http/Kernel.phpにミドルウェアを追加します。
<?php

namespace App\Http;

use Illuminate\Foundation\Http\Kernel as HttpKernel;

class Kernel extends HttpKernel
{
    /**
     * The application's global HTTP middleware stack.
     *
     * These middleware are run during every request to your application.
     *
     * @var array
     */
    protected $middleware = [
        \App\Http\Middleware\TrustProxies::class,
        \App\Http\Middleware\CheckForMaintenanceMode::class,
        \Illuminate\Foundation\Http\Middleware\ValidatePostSize::class,
        \App\Http\Middleware\TrimStrings::class,
        \Illuminate\Foundation\Http\Middleware\ConvertEmptyStringsToNull::class,
        //追加
        \Fruitcake\Cors\HandleCors::class,
];次に.envファイルに許可したいクライアント側のドメインを記入しておきます。
CORS_ALLOWED_ORIGIN=http://localhost:3000記入が完了したら以下のコマンドでCORSの設定ファイルを作成します。
php artisan vendor:publish --tag="cors"config/cors.phpが作成されるので、下記の内容で編集します。
<?php

return [

    /*
    |--------------------------------------------------------------------------
    | Laravel CORS Options
    |--------------------------------------------------------------------------
    |
    | The allowed_methods and allowed_headers options are case-insensitive.
    |
    | You don't need to provide both allowed_origins and allowed_origins_patterns.
    | If one of the strings passed matches, it is considered a valid origin.
    |
    | If array('*') is provided to allowed_methods, allowed_origins or allowed_headers
    | all methods / origins / headers are allowed.
    |
    */

    /*
     * You can enable CORS for 1 or multiple paths.
     * Example: ['api/*']
     */
    'paths' => ['api/*'],

    /*
    * Matches the request method. `[*]` allows all methods.
    */
    'allowed_methods' => ['*'],

    /*
     * Matches the request origin. `[*]` allows all origins.
     */
    'allowed_origins' => [env('CORS_ALLOWED_ORIGIN')],

    /*
     * Matches the request origin with, similar to `Request::is()`
     */
    'allowed_origins_patterns' => [],

    /*
     * Sets the Access-Control-Allow-Headers response header. `[*]` allows all headers.
     */
    'allowed_headers' => ['*'],

    /*
     * Sets the Access-Control-Expose-Headers response header with these headers.
     */
    'exposed_headers' => [],

    /*
     * Sets the Access-Control-Max-Age response header when > 0.
     */
    'max_age' => 0,

    /*
     * Sets the Access-Control-Allow-Credentials header.
     */
    'supports_credentials' => true,
];
変更している箇所は以下の3点です。
● paths:  指定したパスにのみクロスドメインのリクエストを許可する設定
● allowed_origins: クロスドメインのリクエストを許可するドメインを指定
● supports_credentials: クロスドメインでCookieの送受信を許可する設定特にpathsはデフォルトで空なのですが、この項目は必ず設定しないとクロスドメインが許可されませんので注意してください。
これで/api以下のレスポンスヘッダに以下の内容が返されるようになり、クロスドメインでのリクエストとCookieの送受信が可能になります。
Access-Control-Allow-Credentials: true
Access-Control-Allow-Origin: 今回許可したドメイン
Ajax以外のリクエストを制限するミドルウェアを作成する
今のままだと、URLやcurlから直接APIを実行できてしまいます。
NuxtからのAjax通信のみ受け付けるようにしたいので、Ajax以外のリクエストを制限するミドルウェアを作成します。
app/Http/Middlewareに以下の内容のAjaxOnly.phpを追加します。
Ajax通信以外の場合は403エラーを返すという処理です。
<?php

namespace App\Http\Middleware;

use Closure;

class AjaxOnly
{
    public function handle($request, Closure $next)
    {
        if ($request->ajax()) {
            return $next($request);
        }
        abort(403);
    }
}またapp/Http/Kernel.phpのAPIミドルウェアに追記します。
    /**
     * The application's route middleware groups.
     *
     * @var array
     */
    protected $middlewareGroups = [
        'web' => [
            \App\Http\Middleware\EncryptCookies::class,
            \Illuminate\Cookie\Middleware\AddQueuedCookiesToResponse::class,
            \Illuminate\Session\Middleware\StartSession::class,
            // \Illuminate\Session\Middleware\AuthenticateSession::class,
            \Illuminate\View\Middleware\ShareErrorsFromSession::class,
            \App\Http\Middleware\VerifyCsrfToken::class,
            \Illuminate\Routing\Middleware\SubstituteBindings::class,
        ],

        'api' => [
            \App\Http\Middleware\EncryptCookies::class,
            \Illuminate\Cookie\Middleware\AddQueuedCookiesToResponse::class,
            \Illuminate\Session\Middleware\StartSession::class,
            \Illuminate\View\Middleware\ShareErrorsFromSession::class,
            //追加
            \App\Http\Middleware\AjaxOnly::class,
            'throttle:60,1',
            \Illuminate\Routing\Middleware\SubstituteBindings::class,
        ],
    ];
これで「許可したドメインからのAjax通信」のみAPIを実行できるようになるため、
curlコマンドはもちろん、許可していない他サイトからのAjax通信も防ぐことが出来ます。
axiosでAjax通信の設定を行う
APIの実装は完了したので、ここからはNuxt側の作業を進めていきます。
クロスドメインの場合、X-Requested-WithヘッダにXMLHttpRequestをつけないと、
API側でリクエストがAjaxであることを判定できません。
そのためaxiosの全部のリクエストにX-Requested-Withヘッダを追加する必要がありますが、
Nuxtではこのような共通設定を行うためにプラグインという仕組みがあります。
まず以下の内容でplugins/axios.jsを作成します。
export default function ({ $axios }) {
  $axios.defaults.headers.common['X-Requested-With'] = 'XMLHttpRequest'
}そして次の内容でnuxt.config.jsに設定を追加します。
/*
** Plugins to load before mounting the App
*/
plugins: [
  //追加
  '~/plugins/axios'
],これで全てのaxiosのリクエストにX-Requested-Withヘッダが追加され、
APIを実行しても403エラーにならないようになります。
axiosでCORSの設定を行う
次にNuxt側でもCORSを許可する設定を行っていきます。
まず以下コマンドでdotenvをインストールします。
yarn add @nuxtjs/dotenv次に以下の内容の.envファイルを作成します。
API_URL=http://localhost:8000/api作成が完了したら、次はnuxt.config.jsを以下の内容に修正します。
//追加
require('dotenv').config()

export default {
  mode: 'universal',
  /*
  ** Headers of the page
  */
  head: {
    title: process.env.npm_package_name || '',
    meta: [
      { charset: 'utf-8' },
      { name: 'viewport', content: 'width=device-width, initial-scale=1' },
      { hid: 'description', name: 'description', content: process.env.npm_package_description || '' }
    ],
    link: [
      { rel: 'icon', type: 'image/x-icon', href: '/favicon.ico' }
    ]
  },
  /*
  ** Customize the progress-bar color
  */
  loading: { color: '#fff' },
  /*
  ** Global CSS
  */
  css: [
  ],
  /*
  ** Plugins to load before mounting the App
  */
  plugins: [
    '~/plugins/axios'
  ],
  /*
  ** Nuxt.js dev-modules
  */
  buildModules: [
  ],
  /*
  ** Nuxt.js modules
  */
  modules: [
    // Doc: https://axios.nuxtjs.org/usage
    '@nuxtjs/axios',
    //追加
    '@nuxtjs/dotenv',
  ],
  /*
  ** Axios module configuration
  ** See https://axios.nuxtjs.org/options
  */
  axios: {
   //追加
    baseURL: process.env.API_URL,
    //追加
    credentials: true
  },
  /*
  ** Build configuration
  */
  build: {
    /*
    ** You can extend webpack config here
    */
    extend (config, ctx) {
    }
  }
}
特に重要な変更箇所は以下の2点です。
● baseURL: credentialsで許可するドメインのベースURLを指定
● credentials: クロスドメインのCookie送受信を許可する設定
これでクロスドメインでのCookie送受信がクライアント側でも出来るようになります。
ログインした管理ユーザーを保存するStoreを作成する
Nuxtではページを横断してデータを保存するために、Storeというデータを全体で共有する仕組みがあります。
store以下に扱いたいデータの内容と、操作用のメソッドを書いたファイルを記述することで設定が可能です。
今回はログインユーザーを管理したいので、以下の内容のstore/auth.jsを作成します。
これでログイン後にAPIから返ってくる管理者ユーザーのデータを全体で共有できるようになります。
export const state = () => ({
  admin_user: null
})

export const mutations = {
  setAdminUser (state, admin_user) {
    state.admin_user = admin_user
  }
}

export const actions = {
  async login ({ commit }, { email, password }) {
    const response = await this.$axios.$post('/login', { email, password })
      .catch(err => {
        console.log(err)
      })
    commit('setAdminUser', response)
  }
}
APIからログイン中の管理者ユーザーを取得するようにする
Storeのデータはリロードすると消えてしまうため、
画面表示前にAPIからログイン中のユーザー情報を取得して毎回Storeにセットする処理が必要になります。
以下の内容でstore/index.jsを追加します。
export const actions = {
  async nuxtServerInit ({ commit }, { app }) {
    await app.$axios.$get('/current_admin_user')
      .then(admin_user => commit('auth/setAdminUser', admin_user))
      .catch(() => commit('auth/setAdminUser', null))
  }
}nuxtServerInitはSSR時に実行される処理で、
これでCookieが有効な間はログイン中の管理者ユーザーの情報が毎回セットされるようになります。
ログイン中かをチェックして画面遷移させるミドルウェアを作る
Nuxtには画面の表示前に、何か処理を実行したい時にミドルウェアという仕組みがあります。
今回はログイン中かどうかをチェックして、表示する画面を変更するミドルウェアを作ってみたいと思います。
middlewareに以下の内容のnot_logined_admin_user.jsというファイルを作成します。
export default function ({ store, redirect }) {
  if (!store.state.auth.admin_user) {
    redirect('/admin/login')
  }
}先ほど作成したStoreにstate.auth.admin_userがセットされていなければ、ログイン画面に遷移させるという処理になります。
次に同様にmiddleware以下の内容のlogined_admin_user.jsというファイルを作成します。
export default function ({ store, redirect }) {
  if (store.state.auth.admin_user) {
    redirect('/admin')
  }
}ログイン中の場合は/admin/loginにアクセスしても、ログイン後の画面を表示するために利用します。
ログイン後の画面を作成する
元々の要件が/adminにアクセスした際にログインしていない場合は、ログイン画面に遷移するので、以下の内容のpages/admin/index.vueというファイルを作成します。
<template>
  <section>
    <h1>管理画面へようこそ</h1>
  </section>
</template>

<script>
export default {
  middleware: 'not_logined_admin_user',
}
</script>先ほど作成したnot_logined_admin_user.jsをミドルウェアとして指定しているため、/adminにアクセスした際にログインしていない場合はログイン画面に遷移されるようになります。
ログイン画面を作成する
次に以下の内容のpages/admin/login.vueというファイルを作成します。
<template>
  <section>
    <h1>Login</h1>
    <form @submit.prevent="submit">
      <div>
        <label for="email">email</label>
        <input type="text" id="email" v-model="email" />
      </div>
      <div>
        <label for="password">password</label>
        <input type="password" id="password" v-model="password" />
      </div>
      <button type="submit">login</button>
    </form>
  </section>
</template>

<script>
export default {
  middleware: 'logined_admin_user',
  data () {
    return {
      email: '',
      password: ''
    }
  },
  methods: {
    async submit () {
      await this.$store.dispatch('auth/login', {
        email: this.email,
        password: this.password
      })
      this.$router.push('/admin')
    }
  }
}
</script>storeにはdispatchというイベントを通知する仕組みがあり、actionで定義されているイベントが通知されると、データを操作する処理が実行されます。
今回はログインのイベントを通知し、入力されたメールアドレスとパスワードが正しければ、storeに管理者ユーザーの情報が保存され、ログイン後の画面が表示されます。
アプリを起動して動作を確認する
ここまで実装ができたら、最初に定義した以下の要件が満たせているか確認していきます。
● ユーザー登録機能は実装せず、事前に用意した管理者ユーザーでログインできる
● /adminにアクセスした際にログインしていない場合は、ログイン画面に遷移する
まず、下記コマンドでLaravel(API)サーバーを起動します。
php artisan serve次に以下のコマンドでNuxtアプリを起動します。
yarn run dev起動が完了したら、http://localhost:3000/adminにアクセスします。
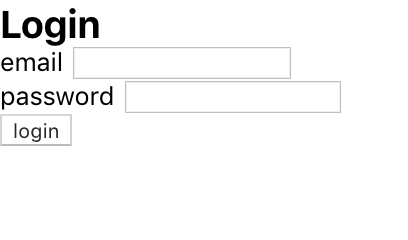
まだスタイルを反映していないので簡素ですが、上記のような画面が表示されればOKです。
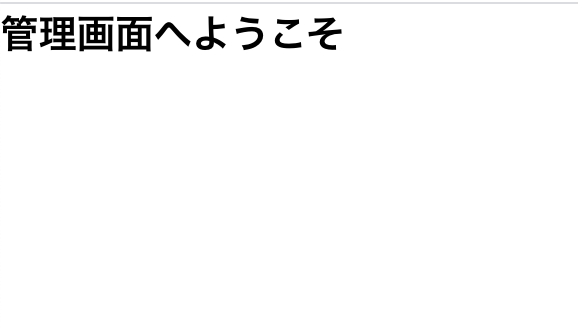
次に事前に登録した管理者ユーザーのメールアドレスとパスワードを入力してloginをクリックします。
以下のような画面が表示されればOKです。
http://localhost:3000/admin/loginにアクセスしたら、
ログイン中なので、/adminにリダイレクトされることも確認しておきましょう。
次にログアウトさせたいので、
以下のようにブラウザの開発者ツールからCookieを削除します。
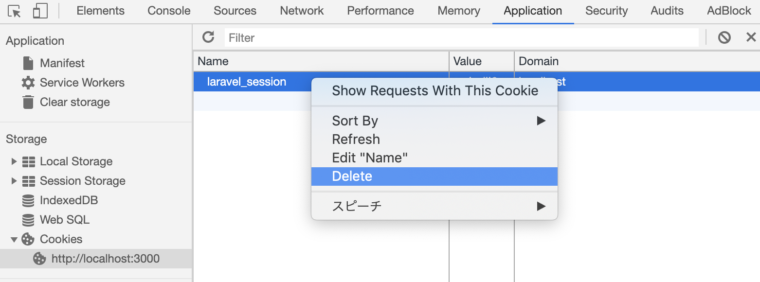
これで再度アクセスすると、ログイン画面が表示されればOKです。
おわりに
今回はCookieを使ったAPI経由でのユーザー認証機能の実装を行いました。
同様の流れで一般ユーザーと管理者ユーザーそれぞれに認証機能を用意することが出来ますね。
管理画面に最低限必要になるCRUD機能の実装はこちらの記事で解説しています。
DEHAソリューションズではPHPに強いエンジニアが多数在籍しています。エンジニアを1から採用するよりも、効率的で低コストで、エンジニアのスポット派遣や開発サポートもおこなっています。Laravelの環境構築を行いたい方や、PHPエンジニアの採用をしたい方はぜひお問い合わせください。
国内エンジニアは高いし、開発を遅らせたくない。
そんなあなたへ dehaソリューションズではオフショア開発によって低コストで迅速な開発をサポートしています。
数多くの案件を開発してきたdehaへの開発相談や無料お見積り相談はこちらから!
よく読まれている記事

ベトナムオフショア:品質改善のすすめ VOL.1 中小規模案件におけるV字モデルの課題
2018/12/11
ラボ型開発(ラボ契約)とは?メリット・デメリット、請負型開発との違いをご紹介
2022/10/10
【最新版】オフショア開発で注目のベトナム:IT市場の全貌と成功の鍵
2025/01/15